About
Animation engine I developed from scratch while I was in my Senior year at DigiPen. It is capable of GLTF model loading with skeletal animations, spline creation and interpolation, 1d and 2d pose blending, with an integrated blend tree editor, inverse kinematics, and even cloth simulation. Check out its source code here.
- C++ from scratch
- 3 months
- Individual project
Cloth Simulation
Demo Video
About the demo
Cloth simulation using a Verlet particle system, where the particles are held together to form a grid, under a set of constraints: mantaining the distance ("rest length") between each particle, and solving collisions against other objects. These particles are affected by some physics forces, like gravity, or a simple wind effect that I showcase in the demo, and the constraints are solved iteratively, leading to a semi-realistic result. I also added a normal mapped texture to this grid of particles to make it look more realistic.
The implementation for this demo is based on a research paper published by Thomas Jakobsen when he was working in IO Interactive. See the paper here.
GLTF Skeletal Animations
Demo Video
About the demo
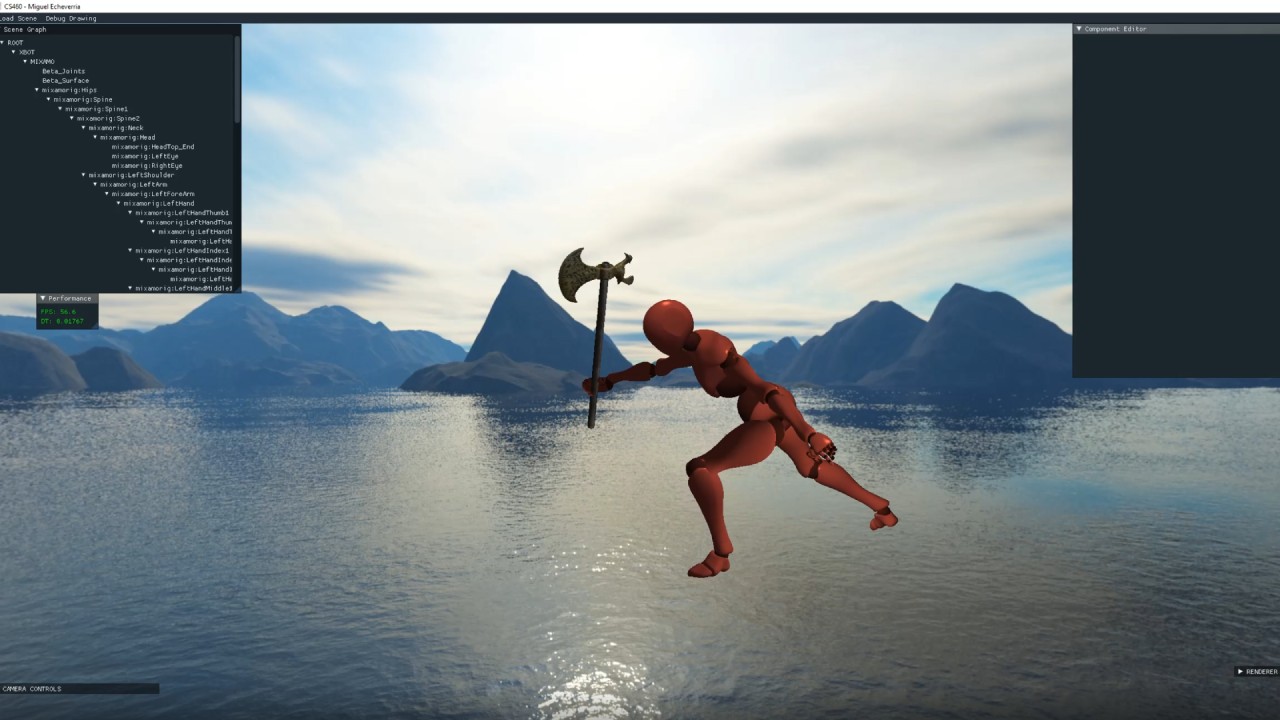
The engine has an importer for GLTF models with skeletal animations. These models can be added either by adding a model component to an entity and selecting the appropriate model from the models folder, or by dragging and dropping the file into the scene.
Each joint belonging to the GLTF model is loaded as a separate scene node, which gives the user the flexibility to add models/animations, as children of specific joints (similar to Unreal's "sockets"). This is specially useful if you want your character to hold a weapon in their hands for example.
Animation Blending
1D Blending - Character Locomotion System
About the demo
This demo showcases a simple but smooth character locomotion system that I developed to showcase the 1D pose blending features of the engine. The character changes between dancing (full stop), walking, jogging, and full sprinting depending on the gamepad left stick input, as well as the right trigger (for sprinting).
The blending parameter and each of the animation nodes can be seen in the right side window. The animation in each of the nodes can be changed through the editor, as well as the node's position. This is something that I'll show in the following video.
2D Blending and Blend Editor
About the demo
The first part of this demo consists of a character with a locked orientation (similar to locking a target in a combat system). The final pose to use for its animation is calculated using barycentric coordinates, and it is a mixture between moving forward, backward, to the left and to the right.
The second part showcases how the blend parameter's position can be manually edited through the GUI, and how the blend nodes can also be moved around.
Inverse Kinematics
Demo Video
About the demo
Implemented Inverse Kinematics with a few different methods. First, I used an analytical approach for a system of 2 bones in 2D (not shown in video). Then I implemented an iterative method in 3D called Cyclic Coordinate Descent (CCD), but the results were not as great as it was expected, so finally, I implemented the FABRIK (Forward And Backward Reaching IK) method, which is the one shown in the video.
In the video, I first show the FABRIK method applied to a set of independent joints, where I dynamically move the joints to increase/decrease the size of the bones, and I also move the end effector around, showing what happens when it gets out of reach. Later, I have a small demo where I show how this IK system would work as part of a bigger skeleton with other Forward Kinematic bones.
Splines
Demo Video
About the demo


